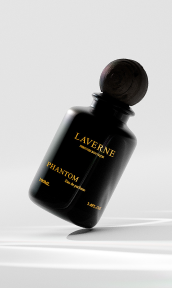
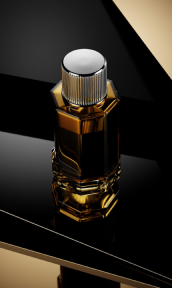
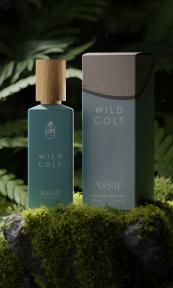
In the competitive world of beauty and personal care products, captivating product images are crucial for grabbing consumer attention and driving sales. This is especially true for hair dryers, where visual appeal can significantly influence purchasing decisions. Here are a few creative and effective techniques to elevate your hair dryer product photography.
Close-Up Shots to Emphasize Design and Features

Close-up shots highlight the intricate details of a hair dryer, showcasing its craftsmanship and specific features. By focusing on the finer aspects of the product, you can create compelling images that attract potential buyers. Here’s how to effectively capture and emphasize these details:
Macro Lenses
Macro lenses allow you to capture the small and intricate details of the hair dryer that standard lenses might miss. This includes the texture of the materials, the precision of the manufacturing, and any fine detailing.
Use a macro lens to emphasize the quality and craftsmanship of the hair dryer. This could be the smooth finish of the plastic, the detailed engraving on a metal part, or the fine mesh of an air filter.
Close-ups with macro lenses can draw attention to specific elements such as control buttons, air vents, and branding logos. This level of detail helps convey the product’s quality and design precision to potential buyers.
Lighting Control
Diffused lighting, such as that provided by softboxes or diffusers, spreads light evenly across the product, reducing harsh shadows and highlights. This type of lighting is essential for close-up shots as it helps to maintain the natural look of the product.
Proper lighting can enhance the textures and materials of the hair dryer. Diffused light brings out the subtle details without creating glare or overly bright spots.
Adjust the lighting to ensure that all parts of the product are well-lit. This balanced exposure helps in showcasing the true colors and finishes of the hair dryer, making it more appealing.
Angle Variation
Shooting from multiple angles allows you to cover all aspects of the hair dryer. Each angle can reveal different features and design elements, providing a more complete understanding of the product.
Different angles can showcase the functionality of the hair dryer, such as the placement of buttons, the shape of the nozzle, or the design of the grip. This helps potential buyers see how the product can be used in real-life scenarios.
Varying the angles adds dynamism to your photographs. Experiment with top-down views, side profiles, and 45-degree angles to create a visually interesting and informative set of images.
Close-up shots are crucial for highlighting a hair dryer’s design and features. Using the above-mentioned tips can help you create compelling images that showcase the product’s quality and craftsmanship.
Experimenting with Angles to Showcase Functionality

Experimenting with different angles is essential for revealing various aspects of a hair dryer’s design and functionality. By capturing the product from multiple perspectives, you can provide a comprehensive and engaging visual representation that highlights both aesthetic and practical features.
Top-Down View – A top-down view offers a clear and unobstructed look at the entire hair dryer. This angle is ideal for showing the overall design, including the arrangement of controls and the shape of the body.
Ensure the hair dryer is centered and well-aligned in the frame to create a balanced and visually appealing composition. This angle can effectively showcase any symmetrical design elements, emphasizing the product’s aesthetic appeal.
Side Angles – Side angles reveal the profile of the hair dryer, showcasing its ergonomic design, handle shape, and nozzle orientation. This perspective is crucial for demonstrating how the hair dryer will feel and look in use.
Emphasize features like the curvature of the handle, the length of the nozzle, and the placement of buttons, which contribute to the overall user experience. Highlight practical elements such as the air intake vents, cord attachment, and cooling button placement.
45-Degree Angle – A 45-degree angle combines elements of both the top-down and side views, providing a dynamic and three-dimensional perspective. This angle helps to show the depth and structure of the hair dryer.
This perspective adds depth to the image, making the product appear more realistic and tangible. The 45-degree angle can make the photograph more engaging and visually interesting, capturing attention quickly.
User Perspective – Capturing the hair dryer from the user’s perspective shows how it looks when held and operated, providing a practical context for potential buyers.
This angle helps demonstrate the size of the hair dryer relative to a human hand, making it easier for customers to gauge its dimensions and ergonomic fit. Highlight the ease of access to controls and buttons from the user’s viewpoint, emphasizing the intuitive design.
Experimenting with angles is an effective way to showcase the functionality and design of a hair dryer. These varied angles enhance the aesthetic appeal and provide valuable insights into the hair dryer’s functionality, helping potential buyers make informed decisions.
Optimizing Lighting for Flattering Results

Proper lighting is critical for showcasing a hair dryer’s colors and materials effectively. It can significantly enhance the product’s visual appeal by highlighting its best features and ensuring that the images are clear and attractive.
Softbox Lighting – Softbox lighting spreads light evenly across the product, reducing harsh shadows and highlights. This type of lighting is ideal for capturing the true colors and details of the hair dryer.
Diffused light from a softbox mimics natural lighting conditions, providing a soft and even illumination that makes the product look appealing and realistic. Softboxes come in various sizes and shapes, making them versatile for different shooting scenarios. They can be positioned to highlight specific areas of the hair dryer.
Reflectors – Reflectors can be used to bounce light into darker areas of the hair dryer, ensuring that every part of the product is well-lit and visible. This technique helps to reveal details that might otherwise be lost in shadows.
By adjusting the angle of the reflector, you can control the direction and intensity of the bounced light, providing precise lighting adjustments. Reflectors are a cost-effective solution to enhance lighting without the need for additional light sources.
Backlighting – Backlighting places a light source behind the hair dryer, creating a glow around its edges and highlighting its silhouette. This technique adds depth and makes the product stand out from the background.
Backlighting can create a dramatic and visually interesting effect, drawing attention to the product’s outline and emphasizing its shape. Combining backlighting with front or side lighting can create a more three-dimensional appearance, making the hair dryer look more dynamic and engaging.
Natural Light – Natural light, especially from a north-facing window, provides a soft and even illumination that is flattering for product photography. It reduces the need for additional lighting equipment and creates a natural look.
Natural light helps in achieving accurate color representation, ensuring that the hair dryer’s colors are depicted correctly. Depending on the time of day and weather conditions, natural light can create different moods and atmospheres, enhancing the overall aesthetic of the photograph.
Adjustable Lights – Adjustable lights allow you to modify the intensity and direction of the lighting, providing flexibility to achieve the desired effect. This is particularly useful for highlighting specific features or creating shadows to add depth.
Use adjustable spotlights to focus on particular details of the hair dryer, such as buttons, logos, or textures. Ensure consistent lighting across multiple shots by maintaining the same light settings, which helps in creating a cohesive and professional look.
Optimizing lighting is crucial for creating attractive images of a hair dryer. Proper lighting highlights the hair dryer’s features, making it more appealing to buyers.
Incorporating Props for Context

Incorporating props in product photography adds context and helps potential buyers relate to the hair dryer. Props can create a narrative, setting a scene that showcases the product in a real-life setting, making it more appealing and relatable.
Hair Brushes and Combs -Including hair brushes and combs in the shot helps to create a complete hair styling scene. This not only highlights the functionality of the hair dryer but also suggests how it fits into a broader beauty routine.
Position the brushes and combs as they would be used in real life. For example, place them next to the hair dryer or in a holder nearby. Use brushes and combs that complement the color scheme of the hair dryer to create a harmonious and visually appealing composition.
Model Hands – Including model hands in the shot helps potential buyers gauge the size of the hair dryer and see how it fits in hand. This is particularly useful for showcasing ergonomic design and ease of use.
Capture shots of the model holding the hair dryer, pressing buttons, or adjusting settings. These interactive images demonstrate the hair dryer’s usability and functionality. Use hands of different sizes and skin tones to appeal to a broader audience, showing that the product is suitable for various users.
Bathroom Setup – Set up the hair dryer in a realistic bathroom environment to show how it will look and function in a typical setting. Include common bathroom items like mirrors, sinks, and countertops.
Ensure the bathroom setup is tidy and well-organized. A clutter-free environment keeps the focus on the hair dryer while still providing context. Use bathroom-appropriate lighting to enhance the realism of the scene. Soft, diffused lighting can create a warm and inviting ambiance.
Hair Styling Products – Include hair styling products such as gels, sprays, and serums in the shot. This not only adds context but also suggests a complete beauty regimen, making the hair dryer part of a holistic hair care solution.
Position the products around the hair dryer in a way that looks natural and appealing. Ensure that the labels are facing the camera to maintain a professional look. Choose styling products that match or complement the color scheme of the hair dryer to create a cohesive and attractive image.
Mirrors and Towels – Use mirrors to create interesting reflections and add depth to the photograph. This can also help to show different angles of the hair dryer simultaneously.
Incorporate towels to add texture and warmth to the scene. Folded or rolled towels can create a spa-like atmosphere, enhancing the overall aesthetic. Small details like a neatly folded towel, a comb placed on the counter, or a mirror reflecting the hair
Using props in product photography can add context and make the hair dryer more relatable to potential buyers. Try to use different ones to create engaging and realistic images that enhance the storytelling and keep the clients focused on your product.
Capturing High-Resolution Images for Clarity

High-resolution images are essential for providing potential buyers with clear and detailed views of the hair dryer. By ensuring that your photographs are crisp and sharp, you can effectively showcase the product’s quality and features, helping customers make informed purchasing decisions.
High-Resolution Camera – Invest in a high-resolution camera capable of capturing sharp and detailed images. Higher resolution allows for greater clarity and detail, ensuring that every aspect of the hair dryer is captured accurately.
Choose a camera with a high megapixel count to maximize image resolution. This allows for larger print sizes and more significant cropping without sacrificing quality.
Tripod – Use a tripod to stabilize the camera and minimize camera shake, resulting in sharper images. This is particularly important for close-up shots and long exposure times. A stable camera platform ensures that each image is sharp and clear, even at slower shutter speeds or smaller apertures. Using a tripod helps maintain consistency across multiple shots, ensuring that each image has the same level of detail and clarity.
Post-Processing – Apply sharpening techniques in post-processing to enhance image clarity and detail. However, be careful not to over-sharpen, as this can introduce artifacts and make the image appear unnatural. Adjust color balance and saturation to ensure accurate and vibrant colors, further enhancing the overall image quality.
Zoom Capability – Use a camera with optical zoom capabilities to capture detailed shots of the hair dryer from various distances. Optical zoom preserves image quality, unlike digital zoom, which can degrade image clarity.
Capture close-up shots of specific features and details of the hair dryer, allowing potential buyers to inspect the product closely. Adjust the focal length to suit different shooting scenarios while maintaining high image resolution.
Consistent Quality – Capture images in a high-quality file format such as RAW or TIFF to preserve maximum detail and flexibility during post-processing. Ensure that the camera is set to its highest resolution setting to capture the maximum level of detail in each image.
Invest in ample storage space to accommodate large file sizes generated by high-resolution images, preventing compression and loss of image quality.
To effectively showcase the hair dryer, high-resolution images are essential. These images help potential buyers make informed decisions by providing clarity and detail to assess the hair dryer’s design, ultimately increasing their confidence in making a purchase.
Utilizing Lifestyle Shots for Relatability

Lifestyle shots are invaluable for placing your product in real-world contexts, allowing potential customers to envision how the hair dryer fits seamlessly into their daily lives. By incorporating relatable scenarios and genuine interactions, you can create a connection with your audience and make the product more appealing.
Model Photography
- Humanizing the Product: Incorporate models using the hair dryer in various settings, such as at home, in a salon, or while traveling. This adds a human element to the product, making it more relatable and demonstrating its practical use in different situations.
- Emotional Connection: Choose models that reflect your target demographic and showcase diverse ages, ethnicities, and lifestyles. This ensures that a wide range of potential customers can see themselves using the product.
- Contextual Storytelling: Develop narratives around the models’ interactions with the hair dryer, illustrating how it enhances their daily routines or special occasions.
Natural Settings
- Everyday Environments: Photograph the hair dryer in familiar and comfortable surroundings, such as a cozy bedroom, a well-appointed bathroom, or a bustling kitchen. These settings evoke a sense of authenticity and help viewers envision incorporating the product into their own lives.
- Scenic Backdrops: Consider outdoor settings with natural lighting, such as a serene park or a picturesque beach, to create a tranquil atmosphere. These settings not only showcase the hair dryer but also highlight the versatility of its use beyond indoor spaces.
- Seasonal Themes: Tailor the settings to reflect different seasons or holidays, creating a sense of timeliness and relevance that resonates with viewers.
Styling Tutorials
- Step-by-Step Demonstrations: Provide step-by-step tutorials or guides that showcase the hair dryer’s versatility and functionality. This format allows customers to see the product in action and learn how to achieve different hairstyles or looks.
- Educational Content: Offer tips, tricks, and styling techniques to help customers make the most of their hair dryer. This not only adds value to the product but also positions your brand as a trusted source of expertise in hair care.
- Product Features Showcase: Integrate demonstrations of specific features or attachments of the hair dryer into styling tutorials, emphasizing its versatility and usability.
Using lifestyle shots is a powerful way to make your hair dryer more relatable and engaging to potential customers. These authentic and relatable images evoke feelings and desires, ultimately increasing the likelihood of conversion and fostering brand loyalty.
Adding Motion

Incorporating motion into your product presentation can be a game-changer, offering dynamic visual content that not only demonstrates functionality but also engages viewers on a deeper level. From highlighting key features to providing step-by-step tutorials, GIFs, and videos provide an interactive and immersive experience that enhances customer understanding and appreciation of the hair dryer.
360-Degree Videos – Capture the hair dryer from every angle with 360-degree videos, allowing viewers to rotate and explore the product virtually. This immersive experience provides a thorough understanding of the product’s design and features, enhancing its appeal.
Enable viewers to interact with the video, controlling the viewing angle and zoom level to focus on specific details of interest. This interactive element creates a sense of empowerment and involvement, fostering a deeper connection with the product.
Take viewers on a virtual tour of the hair dryer’s key features, highlighting its design elements, functionality, and ergonomic features. This guided exploration enables customers to fully appreciate the product’s capabilities and benefits.
Demonstration Clips – Produce short video clips that highlight the hair dryer’s key features in action, such as adjustable heat settings, cool shot functionality, or ergonomic design. These demonstrations effectively communicate the product’s capabilities and benefits, helping viewers envision how it can meet their needs.
Showcase the hair dryer being used in different scenarios, such as drying hair after a shower, styling for a special occasion, or creating voluminous curls. By depicting real-life applications, these clips demonstrate the versatility and functionality of the product in various situations.
Create side-by-side comparison videos that showcase the hair dryer’s performance against competitors, highlighting its superior features, efficiency, and user-friendliness.
By embracing dynamic visual content, you can create a memorable and compelling shopping experience.
Creating Consistent Branding with Color Schemes

Creating consistent branding with color schemes is more than just selecting hues that look good together; it’s about weaving a visual narrative that strengthens your brand identity and fosters recognition among your audience. Here are some tricks on how to do it.
Background Colors
- Complementing the hair dryer: When choosing background colors, aim for shades that complement the color palette of your hair dryer. Harmonizing the background with the product creates visual unity and draws attention to the main subject.
- Reflecting Brand Colors: Incorporate background colors that echo your brand’s established color scheme. This reinforces brand identity and helps viewers associate the product with your brand, even without explicit branding elements.
- Texture and Pattern Consideration: Experiment with textured backgrounds or subtle patterns that complement the design aesthetic of the hair dryer. Texture adds visual interest and depth to the image, enhancing overall composition.
Prop Colors
- Matching Brand Palette: Select props with colors that directly match your brand’s color palette. This ensures consistency across all visual elements and reinforces brand recognition.
- Enhancing Brand Colors: Alternatively, choose props with colors that enhance or accentuate your brand’s color scheme. This approach adds depth and interest to the imagery while still maintaining brand consistency.
- Strategic Placement: Place props strategically within the frame to draw attention to key features of the hair dryer while also reinforcing brand colors. This ensures that props contribute meaningfully to the overall composition without overpowering the main subject.
Brand Elements
- Subtle Logo Placement: Incorporate your brand’s logos or insignias subtly into the background or surrounding elements of your product photography. While not immediately noticeable, these subtle branding elements reinforce brand presence and association.
- Consistent Branding Treatment: Ensure that the placement and size of brand elements remain consistent across all images. This uniformity reinforces brand identity and contributes to a cohesive visual experience for your audience.
- Brand Color Dominance: Ensure that brand colors dominate the visual hierarchy, drawing the viewer’s attention to key branding elements while still allowing the hair dryer to remain the focal point of the image.
Color Grading
- Maintaining Color Harmony: Utilize post-production color grading techniques to maintain color harmony across all your product images. Adjustments in color balance, saturation, and contrast can help achieve a consistent visual aesthetic aligned with your brand’s identity.
- Adapting to Brand Aesthetic: Tailor color grading to match your brand’s aesthetic preferences. Whether it’s vibrant and bold or soft and muted, ensure that the color treatment reflects the overall tone and personality of your brand.
- Seasonal Variation: Consider adapting color grading to reflect seasonal themes or trends, allowing your product imagery to remain fresh and relevant throughout the year while maintaining consistency with your brand’s identity.
Consistency in color usage not only enhances brand recognition but also communicates professionalism and attention to detail, ultimately strengthening the connection between your brand and your customers.
Utilizing Creative Backdrops for Visual Appeal

Integrating creative backdrops into your product photography can enhance visual appeal, capturing attention and enticing viewers to engage with your products. Thoughtfully selecting and designing backdrops for your products creates compelling imagery that enhances brand perception and drives customer interest.
Textured Surfaces
- Marble, Wood, or Fabric: Experiment with textured backgrounds such as marble, wood, or fabric to add depth and visual interest to your product photos. These textured surfaces provide a tactile element that enhances the overall aesthetic and creates a sense of luxury and sophistication.
- Natural Elements: Incorporate natural textures and materials to evoke a sense of authenticity and connection with the outdoors. Whether it’s weathered wood, rough stone, or soft foliage, natural textures add warmth and character to your product imagery.
- Metallic Finishes: Consider metallic finishes for a modern and sleek backdrop option. Reflective surfaces like brushed aluminum or polished steel can add a contemporary edge to your product photos, especially for tech gadgets or high-end accessories.
Thematic Settings
- Alignment with Branding: Choose backdrops that align with your product’s branding and messaging. Whether it’s a rustic farmhouse setting for artisanal products or a sleek urban backdrop for modern gadgets, thematic settings reinforce brand identity and create a cohesive visual narrative.
- Storytelling Opportunities: Utilize thematic settings to tell a story or evoke a specific mood or emotion. By placing your product within a carefully curated environment, you can create a narrative that resonates with your audience and enhances the perceived value of your products.
- Vintage-Inspired Backdrops: Explore vintage-inspired backdrops for a nostalgic and timeless aesthetic. Whether it’s retro wallpaper patterns, old-fashioned textiles, or antique furniture, vintage backdrops can add charm and character to your product photography, particularly for vintage or retro-themed products.
Color Gradients
- Stylish Visual Effects: Experiment with color gradients to create a stylish and visually dynamic backdrop for your product photos. Gradient backgrounds can add depth and dimension to your images, drawing the viewer’s eye toward the focal point of the photograph.
- Customization Options: Tailor color gradients to match your brand’s color palette or the mood you wish to convey. Whether it’s a subtle ombre effect or a bold color transition, gradient backgrounds offer versatility and customization options to suit your aesthetic preferences.
- Abstract Artwork: Consider incorporating abstract artwork or patterns into your gradient backgrounds for a modern and artistic touch. Abstract designs add visual interest and intrigue to your product photos, creating a striking backdrop that captivates viewers’ attention.
Minimalist Backgrounds
- Focus on Product: Opt for minimalist backgrounds that allow your product to take center stage. Clean, uncluttered backgrounds help eliminate distractions and draw the viewer’s attention directly to the product, highlighting its features and benefits.
- Negative Space: Embrace negative space to create a sense of balance and simplicity in your product photography. By leaving ample space around your product, you can create a sense of openness and sophistication that enhances the overall visual impact.
- Monochromatic Backdrops: Explore monochromatic backdrops for a minimalist and refined aesthetic. Choose a single color or tone that complements your product and brand identity, creating a cohesive and visually harmonious composition.
Integrating creative backdrops into your product photography can enhance the aesthetic appeal of your images and captivate your audience. Use different surfaces to create visually compelling imagery that resonates with your audience and reinforces your brand identity.
Wrapping up
Captivating product images are a powerful marketing tool for hair dryers. Consider using lifestyle shots, consistent branding, and post-production refinement to further enhance the appeal of your products.
FAQ
What equipment do I need for hair dryer product photography?
You’ll need a camera (DSLR or mirrorless), suitable lenses, a tripod for stability, lighting equipment, and optional props for creative styling.
How can I make my hair dryer product images stand out?
Focus on creative composition, experiment with angles and lighting, and incorporate props for context. You can also utilize lifestyle settings, and ensure high-resolution images for clarity and detail.
How do I choose the right backdrop for hair dryer product photography?
Consider using textured surfaces like wood or fabric, thematic settings aligned with your brand, color gradients for visual interest, minimalist backgrounds to focus attention, or seasonal themes for relevance.
What post-production techniques can enhance hair dryer product images?
Color correction for accurate colors, retouching to remove imperfections, enhancements for sharpening, and lighting adjustments.
How can I ensure consistency in my hair dryer product photography?
Establish a style guide or mood board for reference. Maintain consistent lighting setups, backgrounds, and compositions across all images, and use the same editing techniques and presets for uniformity.


