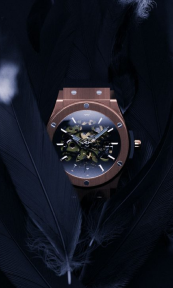
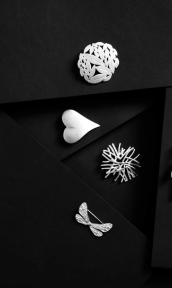
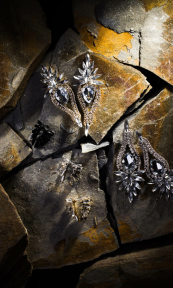
Macro photography allows you to capture the intricate details and textures of jewelry that make each piece unique. Whether you’re an enthusiast or a professional, understanding the latest trends and techniques in jewelry macro photography can elevate your craft. This guide provides comprehensive insights into mastering jewelry macro photography in 2024.
Understanding Macro Photography
Macro photography involves capturing close-up shots of small subjects, revealing details and textures that are often invisible to the naked eye. In the context of jewelry, macro photography allows for the showcase of intricate craftsmanship, delicate settings, and the sparkle of gemstones. Mastering macro photography requires a good understanding of both the technical and artistic aspects of the craft.
What is Macro Photography?
Macro photography is the art of photographing small subjects at close range to produce images where the subject appears larger than life. True macro photography achieves a 1:1 magnification ratio, meaning the subject is captured on the camera sensor at its actual size.
Key Concepts in Macro Photography
- Magnification Ratio:
- The magnification ratio defines the size of the subject on the camera sensor relative to its actual size. A 1:1 ratio means the subject appears life-sized on the sensor.
- Higher magnification ratios (e.g., 2:1, 5:1) result in even greater detail but require specialized equipment and techniques.
- Depth of Field (DoF):
- Depth of field is the range of distance within a photo that appears acceptably sharp. In macro photography, DoF is typically very shallow.
- Managing DoF involves balancing aperture settings to ensure sufficient sharpness across the subject while controlling background blur.
- Working Distance:
- Working distance is the distance between the front of the lens and the subject. Shorter working distances can make lighting and focusing more challenging.
Essential Equipment

Macro Lens
A true macro lens is essential for capturing the fine details of jewelry. These lenses are designed to achieve high magnification ratios, typically 1:1 or higher.
Common macro lenses range from 50mm to 200mm. Shorter focal lengths (50-60mm) are suitable for small setups and controlled environments. Longer focal lengths (100-200mm) offer more working distance, making it easier to light and compose shots without disturbing the subject.
Camera
A DSLR or mirrorless camera with manual controls allows for greater precision in macro photography.
Higher-resolution cameras capture more detail, which is crucial for macro shots. A minimum of 20 megapixels is recommended, though higher resolutions (40-50 megapixels) provide even more detail.
Full-frame sensors offer better image quality and low-light performance but can be more expensive. APS-C and micro four-thirds sensors are more affordable options that still deliver excellent results.
Tripod
A sturdy tripod is critical to keep the camera stable and eliminate shake, which is magnified at high levels of zoom.
Choose a tripod with a solid build to support the weight of your camera and lens. Look for features like a ball head for precise adjustments and a center column that can be reversed for low-angle shots.
Consider a tripod with adjustable legs and a flexible center column to get close to the ground or into tight spaces.
Lighting
Proper lighting is crucial in macro photography to highlight the details and textures of jewelry. Look for lights with adjustable brightness and color temperature.
Ring lights offer even, shadow-free lighting, which is ideal for capturing reflective surfaces like gemstones and metals. Light tents, on the other hand, diffuse light evenly around the subject, reducing harsh shadows and reflections. They are particularly useful for shooting highly reflective jewelry.
Reflectors and Diffusers
Reflectors bounce light onto the subject, filling in shadows and adding highlights, while diffusers soften harsh light. Use small, handheld reflectors to direct light precisely where needed. Silver, white, and gold reflectors offer different tones of reflected light.
Place diffusers between the light source and the subject to create soft, even lighting. Portable diffusion panels or softboxes work well.
Additional Accessories
- Extension Tubes: These are placed between the camera body and lens to increase magnification without affecting image quality.
- Macro Rails: These allow for precise adjustments of the camera position, making it easier to achieve accurate focus.
- Remote Shutter Release: A remote shutter release minimizes camera shake by allowing you to take photos without touching the camera.
By understanding the fundamentals of macro photography and investing in the right equipment, you can capture stunning images that showcase the intricate beauty of jewelry. Whether you are photographing for personal enjoyment or professional use, these techniques will help you create images that truly stand out.
Setting Up Your Shot

Setting up your shot is a crucial step in jewelry macro photography. Attention to detail in the preparation stage can significantly enhance the final image. This section covers the meticulous process of preparing your jewelry, choosing the right background and props, and mastering lighting techniques to capture the best possible shot.
Clean and Prepare the Jewelry
Begin by thoroughly cleaning the jewelry to remove dust, fingerprints, and smudges. Use a soft, lint-free cloth for wiping down metals and a gentle brush for cleaning gemstones and intricate settings. For a deeper clean, consider using a jewelry cleaner or ultrasonic cleaner, but ensure the piece can safely be cleaned with these methods, as some materials are delicate. After cleaning, handle the jewelry with gloves or tweezers to prevent reintroducing fingerprints or oils.
Inspect the jewelry closely to ensure no defects or damage might detract from the image. Address any issues before proceeding with the shoot. Position the jewelry carefully to showcase its best features, adjusting clasps, settings, and stones to ensure they are aligned and look their best from the chosen angle.
Backgrounds and Props
Use neutral backgrounds like white, black, or gray to avoid distracting from the jewelry. These colors highlight the details of the jewelry and can be easily adjusted in post-processing. Materials such as velvet, acrylic, or gradient backdrops are excellent choices; velvet reduces reflections and provides a soft, luxurious feel, while acrylic offers a sleek, modern look. Custom backgrounds that complement the jewelry can also enhance the overall aesthetic, such as a subtle pattern or gradient matching the jewelry’s theme.
Props should be used sparingly to ensure the focus remains on the jewelry. Simple props that complement the jewelry can add context and interest without overshadowing the subject. Choose props that match the style and theme of the jewelry; for example, natural elements like leaves or stones can enhance organic designs, while sleek, modern props can highlight contemporary pieces. Ensure props are positioned to enhance the composition without creating clutter, guiding the viewer’s eye toward the jewelry.
Lighting Techniques
Soft Lighting
Use diffusers like softboxes, light tents, or diffusion panels to soften the light and create even illumination. Soft light minimizes harsh shadows and reduces glare, highlighting the jewelry’s details. A light tent surrounds the jewelry with diffused light, providing even illumination and reducing reflections, which is particularly effective for shooting reflective metals and gemstones.
Directional Lighting
Position lights to the side of the jewelry to create depth and texture, emphasizing the contours and intricate details, making the jewelry appear more three-dimensional. Backlighting, achieved by placing a light source behind the jewelry, can create a halo effect, especially effective for translucent gemstones, enhancing the gemstone’s color and clarity. Directing light from above highlights the top surfaces of the jewelry, making metals and gemstones sparkle and adding visual interest.
Reflective Surfaces
Use small reflective cards or mirrors to bounce light back onto the jewelry, filling in shadows and adding highlights. Silver or white cards work well for this purpose. Additionally, positioning reflective surfaces like whiteboards or metallic reflectors around the jewelry enhances its sparkle and shine. Experimenting with different angles allows you to achieve the desired effect.
By meticulously setting up your shot, you can capture the true beauty and intricate details of jewelry pieces. Proper preparation, thoughtful background, prop selection, and careful lighting can transform your macro photography, making each piece of jewelry shine in its unique way.
Camera Settings and Post-Processing Tips

Mastering camera settings and post-processing techniques is essential for achieving stunning jewelry macro photography. Proper camera settings ensure sharp, well-exposed images, while effective post-processing enhances those images, highlighting the intricate details and beauty of each piece.
Camera Settings
Aperture
A small aperture (f/16 to f/22) is ideal for ensuring all parts of the jewelry are in focus. This increases the depth of field, which is crucial in macro photography where the depth of field is naturally very shallow. However, be mindful of diffraction at tiny apertures, which can reduce sharpness. Finding a balance, such as using f/11 to f/16, often works well.
Shutter Speed
Use a slower shutter speed to capture sharp images, especially when using a tripod. A slow shutter speed allows more light to reach the sensor, but it’s essential to stabilize the camera to avoid motion blur. A remote shutter release or a camera timer can further reduce the risk of a camera shake.
ISO
Keep ISO settings low (100-200) to minimize noise and maintain image quality. Higher ISO settings can introduce grain, which is particularly noticeable in macro shots where detail is critical. Use additional lighting to compensate for the low ISO setting rather than increasing ISO.
Focus
Manual focus is preferred in macro photography for precise control. Use your camera’s live view feature and magnify the image to fine-tune the focus. Focus stacking, which involves taking multiple shots at different focus points and combining them in post-processing, can be employed to achieve greater depth of field.
White Balance
Set the white balance according to the lighting conditions to ensure accurate color representation. Custom white balance settings can be particularly useful when dealing with mixed lighting or specific light sources like LEDs.
Post-Processing Tips
After capturing your jewelry images with the ideal camera settings, post-processing plays a crucial role in enhancing and perfecting these photos. Effective editing can bring out the fine details, correct imperfections, and ensure the jewelry looks as stunning as possible. Here are essential post-processing tips to elevate your jewelry macro photography.
Color Correction
Start by adjusting the white balance to ensure accurate colors. This can be done in photo editing software like Adobe Lightroom or Photoshop. Correcting any color casts ensures that the jewelry’s colors are true to life, which is crucial for showcasing gemstones and metals.
Sharpening
Apply selective sharpening to enhance the fine details without introducing artifacts. Use tools like the Unsharp Mask or High Pass Filter in Photoshop, focusing on the edges of the jewelry to bring out its textures. Be careful not to over-sharpen, which can make the image look unnatural.
Dust and Scratch Removal
Even with meticulous cleaning, small dust particles or scratches can be visible in macro shots. Use the Spot Healing Brush or Clone Stamp tool in Photoshop to remove these imperfections. Zoom in closely to ensure all unwanted marks are eliminated.
Background Cleanup
Clean up the background to remove distractions and enhance the subject. Use the Clone Stamp or Healing Brush tools to smooth out any inconsistencies in the background. For a pure white or black background, use adjustment layers and masks to achieve a seamless look.
Exposure and Contrast
Adjust exposure and contrast to ensure the jewelry is well-lit and stands out against the background. Use the Levels or Curves adjustment tools to fine-tune the brightness and contrast, enhancing the overall clarity of the image.
Focus Stacking
If you have taken multiple shots at different focus points, use focus stacking software like Helicon Focus or the stacking feature in Photoshop to combine them into one image. This technique increases the depth of field, making more of the jewelry appear in sharp focus.
Highlighting Details
Enhance specific details to draw attention to the most critical aspects of the jewelry. Use selective editing techniques to brighten gemstones, enhance metal shine, and bring out textures. Tools like Dodge and Burn can be used to selectively lighten or darken areas, adding depth and dimension.
Color Enhancement
Boost the colors slightly to make the jewelry more vibrant. Increase the saturation and vibrance settings carefully to enhance the natural colors without making them look unrealistic. Pay particular attention to the hues of gemstones and metals to ensure they are accurately represented.
Noise Reduction
Even with a low ISO, some noise might still be present, especially in shadow areas. Use noise reduction tools in your editing software to smooth out these areas while preserving details. Be cautious not to overdo it, as excessive noise reduction can make the image look too smooth and lose its natural texture.
By combining meticulous camera settings with thoughtful post-processing, you can create stunning images that highlight the intricate beauty and craftsmanship of jewelry. Each step contributes to the final image’s quality and impact, ensuring that every detail is perfectly showcased.
Latest Trends in 2025

Jewelry macro photography continues to evolve, incorporating new techniques and technologies that enhance the way we capture and present intricate pieces. Staying up-to-date with these trends can help you create more engaging and high-quality images. Here are the latest trends in jewelry macro photography for 2025, along with practical details to help you implement them.
Focus Stacking
Focus stacking involves taking multiple photographs of the same jewelry piece at different focus points and then combining them into a single image. This technique results in a greater depth of field, ensuring that all parts of the jewelry are in sharp focus.
Implementation:
- Software: Use focus stacking software like Adobe Photoshop, Helicon Focus, or Zerene Stacker.
- Process: Capture a series of images, adjusting the focus slightly for each shot. Combine the images using the software to create a final, sharply focused image.
- Equipment: A macro rail can help make precise adjustments to the focus point.
360-Degree Photography
360-degree photography involves capturing a series of images around the jewelry, which are then stitched together to create an interactive view. This allows viewers to rotate and view the piece from all angles.
Implementation:
- Turntable: Use a motorized turntable to rotate the jewelry while taking photos at regular intervals.
- Software: Stitch the images together using software like Adobe After Effects, Pano2VR, or specialized 360-degree photo software.
- Output: Integrate the final interactive image into websites or online catalogs to provide a comprehensive view of the jewelry.
AI-Powered Editing Tools
AI-powered editing tools can automate and enhance many aspects of post-processing, such as color correction, sharpening, and noise reduction.
Implementation:
- Software: Use tools like Adobe Photoshop’s Sensei, Topaz Labs, or Luminar AI.
- Features: Take advantage of AI features that automatically adjust exposure, enhance colors, remove blemishes, and sharpen details. These tools save time and improve consistency across your images.
High-Speed Photography
High-speed photography captures the movement and sparkle of jewelry, particularly focusing on the dynamic interplay of light with gems and metals.
Implementation:
- Lighting: Use high-speed flashes or strobes to freeze motion.
- Settings: Set your camera to a high shutter speed to capture sharp images of moving elements like swinging pendants or rotating rings.
- Applications: This technique is ideal for video content or creating animated GIFs for online use, showcasing the brilliance and liveliness of jewelry pieces.
Natural and Sustainable Props
Incorporating natural and sustainable props into your jewelry photography aligns with the growing trend toward eco-friendly and organic aesthetics.
Implementation:
- Materials: Use props made from natural materials such as wood, stone, and recycled paper.
- Themes: Create a cohesive look by matching the jewelry with complementary natural elements. For example, pairing gemstone jewelry with raw crystals or gold pieces with wooden backgrounds.
- Sustainability: Highlight the sustainable aspects of your props and process in your marketing materials to appeal to environmentally-conscious consumers.
Holographic and 3D Imaging
Holographic and 3D imaging offers a futuristic way to display jewelry, providing a highly detailed and interactive experience for viewers.
Implementation:
- 3D Scanning: Use a 3D scanner to capture every detail of the jewelry piece.
- Software: Create holographic images using software that supports 3D modeling and rendering.
- Display: Integrate holograms into websites or physical displays for an immersive shopping experience.
By integrating these latest trends into your jewelry macro photography workflow, you can stay ahead of the curve and create captivating images that highlight the unique beauty and craftsmanship of each piece.
Wrapping up
Jewelry macro photography requires patience, precision, and creativity. By mastering the techniques and staying abreast of the latest trends in 2025, you can capture stunning close-up shots that reveal the unique beauty of each piece. Whether for personal enjoyment or professional showcases, these tips will help you elevate your jewelry photography to new heights.
FAQ
What is the best lens for jewelry macro photography?
A true macro lens with a 1:1 magnification ratio is ideal for jewelry photography. Common choices are 50mm, 100mm, or 105mm macro lenses. The 100mm or 105mm lenses are preferred for their greater working distance, allowing more flexibility in lighting and positioning.
How can I achieve sharp focus in my macro shots?
Manual focus is key for macro photography. Use your camera’s live view mode to zoom in and adjust the focus precisely. Additionally, consider using focus stacking to combine multiple images taken at different focus points, ensuring that the entire piece of jewelry is sharp.
What lighting setup works best for jewelry photography?
Soft, diffused lighting is best for jewelry photography to minimize harsh shadows and reflections. Light tents or softboxes are excellent choices. Position lights at different angles, such as side and top lighting, to enhance the jewelry’s texture and sparkle.
How do I reduce reflections and glare on jewelry?
Use a light tent or diffusion panels to create even lighting around the jewelry. Polarizing filters on your camera lens can also help reduce reflections. Adjust the position and angle of your lights and the jewelry to minimize unwanted glare.
What post-processing techniques are essential for jewelry macro photography?
Key post-processing techniques include color correction, sharpening, and dust removal. Use software like Adobe Photoshop or Lightroom to adjust white balance, enhance colors, and sharpen details. Focus stacking software can also be used to increase the depth of field and ensure all parts of the jewelry are in focus.


