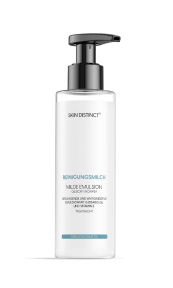
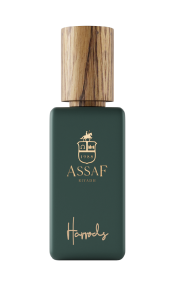
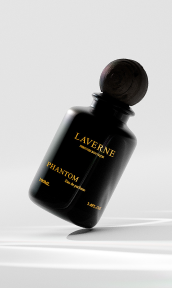
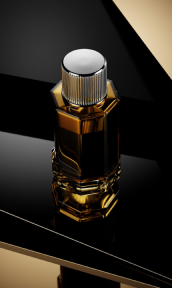
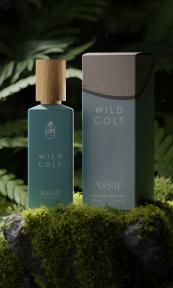
High-quality product images are paramount in attracting customers and boosting sales. Consumers rely heavily on visual representation to make purchasing decisions, making it essential for businesses to present their products in the best possible light. You will get complete guide about product retouching, its benefits, and complete process.
How important are high-quality product images

In the competitive landscape of e-commerce and digital marketing, high-quality product images are more than just visual aids; they are critical components of a successful sales strategy.
Attract Attention
First impressions are crucial. High-quality product images can capture the attention of potential customers within seconds, drawing them in to learn more about the product. For example, consider two listings for a leather wallet on an online marketplace. Listing A features a high-resolution image with excellent lighting, enhancing the texture, color, and craftsmanship of the wallet, in detail. Listing B has a poorly lit, blurry photo where the details are indistinguishable. Listing A is far more likely to catch everyone’s attention and encourage them to click on the product.
Build Trust and Credibility
High-quality images convey professionalism and reliability. When customers see well-crafted photos, they associate them with a reputable brand, which helps build trust and credibility. For instance, if a tech startup launches a new smartwatch, its product page should feature sharp, detailed images showing the watch from multiple angles. These images highlight its design, features, and interface while assuring potential buyers of the product’s quality, leading to increased trust in the brand.
Improve Conversion Rates
Better product images can lead to higher engagement and conversion rates. When customers can see what they are buying, they are more likely to purchase. Think of an online clothing retailer. It will notice a significant difference in conversion rates between products with professionally photographed images and those with amateur photos. The professionally shot items might show the garments on models in well-lit environments, allowing customers to see how the clothes fit and move. As a result, these items experience a 25% higher conversion rate than those with subpar images.
Enhance Perceived Value
High-quality images can elevate the perceived value of a product. When a product is presented in an aesthetically pleasing manner, it can appear more luxurious and desirable. For instance, a jewelry brand uses high-resolution images to showcase their diamond rings. Each photo captures the intricate details, sparkle, and craftsmanship of the pieces. This presentation makes the rings appear more luxurious, justifying a higher price point and attracting buyers willing to pay a premium.
Reduce Returns
Accurate and detailed product images help set the right expectations, reducing the likelihood of returns. Customers who know exactly what they are buying are less likely to be disappointed when the product arrives. An online furniture store, for instance, ensures all its product images are taken from multiple angles, including close-ups of materials and finishes. This thorough representation allows customers to understand the exact look and feel of the furniture, leading to fewer surprises and a 30% reduction in return rates.
Enhance Social Media Engagement
High-quality product images are essential for social media marketing. They can significantly boost engagement rates, leading to more likes, shares, and comments, which drives traffic to your website. A skincare brand that regularly posts high-quality images of products online will have them paired with user-generated content and influencer collaborations, thus getting high engagement rates. The brand can see a direct correlation between these posts and increased website traffic and sales, as visually appealing content encourages social media users to explore more and buy more.
Support Brand Identity
Consistent, high-quality imagery helps establish and reinforce your brand identity. It ensures that your products are immediately recognizable and aligned with your brand’s aesthetic.
Example: A high-end shoe brand that consistently uses a specific lighting style and background for all its product photos creates a cohesive look across its website and marketing materials. Thus, their brand is easily recognizable and reinforces their reputation for quality and style.
In conclusion, investing in high-quality product images is not just about aesthetics; it’s a strategic move that can significantly impact customer attraction, trust, conversion rates, and overall brand perception. By presenting your products in the best possible light, you can stand out in a crowded market, build a strong brand identity, and ultimately drive more sales.
Step-by-step guide to product photography retouching

Retouching product photographs is an essential step in ensuring your images look professional, appealing, and true to life. This guide will walk you through the key stages of retouching, from initial adjustments to final polish, complete with practical tips and examples.
1.Preparation and Initial Adjustments
Before diving into detailed retouching, it’s crucial to start with basic adjustments that set a solid foundation for your image.
Steps:
- Import Your Images: Begin by importing your product photos into your chosen software. For example, use Adobe Lightroom for batch editing or Adobe Photoshop for more detailed adjustments.
- Basic Adjustments: Adjust the exposure, contrast, and white balance to ensure your image has the correct lighting and color tones. For instance, if the image appears too dark, increase the exposure to brighten it up, and adjust the contrast to add depth.
For instance, a photo of a stainless steel watch might initially look dull and underexposed. By increasing the exposure and adjusting the contrast, you can make the watch appear shinier and more appealing.
2.Color Correction
Color correction ensures that the product’s colors are accurate and vibrant, which is crucial for customer satisfaction.
Steps:
- Use the Histogram: Adjust the levels to ensure your image has a full range of tones from black to white. This can be done using the Levels adjustment tool in Photoshop.
- White Balance Adjustment: Correct the white balance to remove any color casts from your image. Use the eyedropper tool on a neutral area of your image to achieve this.
- HSL Adjustments: Fine-tune the Hue, Saturation, and Luminance to enhance the colors of your product. For example, if you’re editing a red handbag, adjust the red hues to ensure they are neither too dull nor overly saturated.
Consider this: A photo of a blue T-shirt might have a yellowish color cast due to indoor lighting. Adjusting the white balance removes this cast, making the blue appear more accurate and vibrant.
3.Background Removal
A clean, distraction-free background helps the product stand out and look professional.
Steps:
- Select the Background: Use tools like the Magic Wand, Quick Selection Tool, or the Pen Tool in Photoshop to select the background.
- Refine the Selection: Use Refine Edge or Select and Mask to get a clean edge around your product. This step is crucial for maintaining a natural look.
- Remove the Background: Delete the background or create a layer mask to hide it, and replace it with a pure white background or any other desired backdrop.
Example: An image of a pair of shoes might have a distracting background with other items in the frame. Removing the background and placing the shoes on a clean white background ensures the focus remains solely on the product.
4.Sharpness Adjustments
Enhancing sharpness highlights the product’s details, making it more appealing and professional.
Steps:
- Duplicate the Layer: Create a duplicate of your product image layer to work on non-destructively.
- Apply High Pass Filter: Set the duplicate layer to Overlay and apply a High Pass Filter (Filter > Other > High Pass). Adjust the radius until the details are enhanced.
- Fine-Tune Sharpness: Use the Unsharp Mask (Filter > Sharpen > Unsharp Mask) for additional sharpening if needed. Adjust the amount, radius, and threshold to achieve the desired sharpness.
For instance, a close-up shot of a leather wallet benefits from sharpness adjustments to highlight the texture and stitching, making these details more pronounced and attractive.
5.Overall Image Polishing
The final polish involves removing imperfections and ensuring the image is as appealing as possible.
Steps:
- Spot Healing Brush/Clone Stamp: Use these tools to remove any dust, scratches, or other imperfections. For instance, clean up any dust particles on the glass surface of a watch.
- Dodge and Burn: Lightly use the Dodge tool to brighten highlights and the Burn tool to deepen shadows. This adds dimension and makes the product look more three-dimensional.
- Vibrance and Saturation: Adjust the vibrance and saturation to make the colors pop without making them look unnatural. This step is particularly useful for colorful products like clothing and accessories.
A photo of a ceramic mug might have small imperfections or dust specks. Using the Spot Healing Brush, you can remove these imperfections. Then, slightly increase the vibrance to make the mug’s color more appealing without overdoing it.
Recommended Tools and Software
- Adobe Photoshop: Industry-standard for photo retouching, offering powerful tools for detailed edits.
- Adobe Lightroom: Excellent for batch editing and color correction.
- GIMP: A free alternative to Photoshop with robust features for photo retouching.
- Capture One: Known for superior color grading and tethered shooting capabilities.
- Affinity Photo: Another powerful and more affordable alternative to Photoshop.
By following these steps and using the recommended tools, you can effectively retouch your product images, making them more attractive and professional. High-quality images are a key component of successful online marketing, helping to attract customers and boost sales.
Best practices for maintaining a natural look in product photography

Maintaining a natural look while enhancing product images is crucial for ensuring the final photos are both appealing and trustworthy. Over-editing can make images appear artificial and unappealing, which can negatively impact customer trust and sales. Here are some best practices to help you achieve a balanced and natural look in your product retouching.
Avoid Over-Editing
Over-editing can result in images that look fake or unrealistic. Aim for subtle enhancements that improve the photo without altering the product’s true appearance.
Make small, incremental adjustments rather than drastic changes. For instance, when enhancing the brightness or contrast, increase these settings gradually until you achieve the desired look.
Avoid smoothing out the product’s texture too much. Texture is often a key feature, especially for items like fabrics or leather goods.
When retouching a leather handbag, for example, focus on enhancing the natural grain and sheen of the leather. Overuse of smoothing filters can eliminate these details, making the handbag look plastic or artificial.
Consistency
Ensure all product images have a consistent look and feel. This consistency helps in creating a professional and cohesive online presence.
Use presets or save your settings for similar products to ensure uniformity across your images. Lightroom and Photoshop both allow you to create and apply presets easily.
Make sure the lighting and color tones are consistent across all images. This is particularly important for products that come in multiple colors or styles.
For instance, for an online clothing store, use the same lighting setup, background, and retouching settings for all product photos. This consistency helps customers compare products easily and builds a cohesive brand image.
Reference Real Products
Always have the actual product on hand to compare the colors and details, ensuring your edits stay true to life. Keep the product next to your monitor as you edit. Regularly compare the edited image with the real product to ensure accuracy. Use a calibrated monitor to ensure the colors you see on the screen match the actual product colors.
When editing images of a new line of sneakers, having the sneakers nearby allows you to match the exact shade of red in the photo to the real shoe, ensuring customers receive what they expect.
Zoom In and Out
Regularly check your image at both 100% (actual pixels) and fit-to-screen views to ensure it looks good up close and from a distance. Zoom in to 100% to check for any imperfections or over-editing signs. This helps in spotting issues that might not be visible at a smaller size. Zoom out to fit-to-screen view to see the image as a whole and ensure the overall appearance is appealing and natural.
For a product like a wristwatch, zoom in to ensure the details of the watch face and strap are clear and sharp. Zoom out to ensure the watch looks proportionate and attractive as a complete image.
Preserve Shadows and Highlights
Shadows and highlights add depth and dimension to images. Ensure these elements are preserved to maintain a natural and realistic appearance.
Use the Dodge tool to enhance highlights and the Burn tool to deepen shadows, but do so sparingly to avoid unnatural results. Ensure highlights on shiny surfaces like metal or glass remain visible, as they contribute to the product’s realistic appearance.
For example, in a photo of a stainless steel kitchen appliance, preserve the natural reflections and highlights that give the appliance its metallic look. Over-editing these areas can make the metal look flat and unrealistic.
Use Layer Masks
Layer masks allow you to make non-destructive edits, meaning you can refine your adjustments without permanently altering the original image.
Apply changes only to specific parts of the image using layer masks. This technique is useful for enhancing certain areas without affecting the whole image. Use a soft brush with low opacity to gradually apply edits, ensuring a smooth transition and a natural look.
When enhancing the color of a product’s logo, use a layer mask to apply saturation adjustments only to the logo, leaving the rest of the product untouched. This method ensures the enhancement looks natural and focused.
By following these best practices, you can enhance your product images while maintaining a natural and appealing look. This balance ensures your products appear realistic and attractive, helping to build customer trust and drive sales.
Wrapping up
You can effectively retouch your product images, making them more attractive to potential customers and boosting your chances of making a sale if you pay attention to the above-mentioned tips. High-quality images are an investment that can significantly enhance your brand’s appeal and credibility in the competitive online market, so make use of them.
FAQ
What software is best for product retouching?
Adobe Photoshop is the industry standard. Adobe Lightroom is great for batch editing, and GIMP is a good free alternative. Affinity Photo and Capture One are also excellent options.
How can I ensure my product photos look consistent across multiple images?
Use the same lighting, background, and camera settings. Utilize presets in Lightroom or Photoshop to apply uniform adjustments, and always compare edited photos for consistency.
How do I maintain accurate colors in my product photos?
Adjust the white balance to remove color casts, use HSL adjustments to fine-tune colors, and compare the edited image with the actual product to ensure accuracy.
How do I avoid making my product photos look over-edited?
Make subtle adjustments, preserve natural texture, use layer masks for selective edits, and compare the edited image with the actual product to maintain accuracy.
Why is background removal important in product photography, and how is it done?
It removes distractions, focusing attention on the product. Use selection tools like Magic Wand or Pen Tool in Photoshop, to refine the edges, and delete or mask the background.


