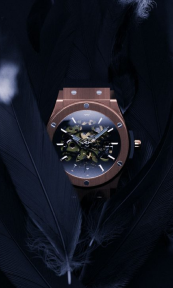
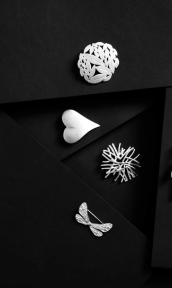
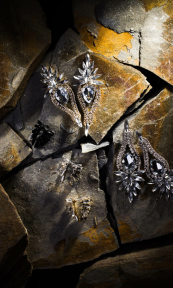
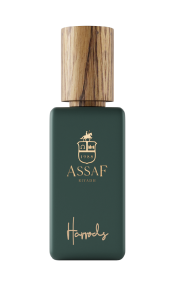
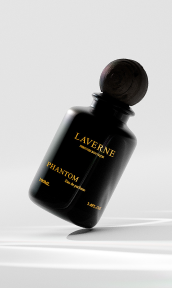
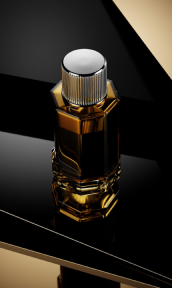
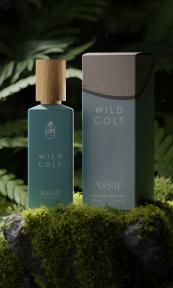
Etsy is a competitive marketplace, where countless sellers vie for the attention of discerning buyers, so the quality of your etsy product photography can make or break your success. For UK-based Etsy sellers, mastering the art of product photography is not just a good idea—it’s essential. The standards for online shopping continue to rise, and high-quality images are more critical than ever. Let’s explore why great product photography matters and how you can elevate your Etsy store with stunning photographs that attract more customers.
The Importance of High-Quality Product Photography

Countless artisans and sellers showcase their creations on high-quality Etsy product photography isn’t just a luxury—it’s a necessity if you want to stand out. The visual representation of your product is often the first interaction a potential customer has with your brand, and this first impression can make all the difference.
Building Trust with Customers
One of the most significant roles of high-quality Etsy product photography is building trust with potential buyers. Online shopping inherently lacks the tactile experience of in-store purchasing, where customers can see, touch, and inspect a product before committing to a purchase. Your photos must compensate for this by providing as much detail and clarity as possible. Crisp, well-lit images convey professionalism and reliability, assuring customers that what they see is what they’ll get.
Blurred or poorly lit photos, on the other hand, can raise red flags for potential buyers. They might question the quality of the product or the credibility of the seller. In an online marketplace, competition is stiff and alternatives are just a click away. By investing in high-quality photography, you eliminate these doubts, making customers feel confident in their purchasing decisions.
Highlighting Product Features
High-quality photography allows you to showcase the unique features of your products in detail. Whether it’s the intricate stitching on a handmade bag, the vibrant hues of a painting, or the delicate design of a piece of jewelry, your photos should highlight what sets your product apart from the rest. This level of detail is crucial for helping customers understand the value of your product and why it might be worth a higher price point compared to similar items.
Multiple angles, close-ups, and varied perspectives are essential in providing a comprehensive product view. This not only helps to answer potential customer questions before they ask but also enhances their shopping experience by giving them a clear and detailed visual narrative of the product.
Enhancing Brand Identity
Your Etsy product photography does more than showcase individual items—it also plays a crucial role in conveying your brand identity. Consistent, high-quality images create a cohesive visual language that communicates who you are as a brand. Whether your aesthetic is minimalist, rustic, modern, or vintage, your photos should reflect this style consistently across all your product listings.
This consistency helps to create a strong, memorable brand presence on Etsy, which can be especially important for building customer loyalty and encouraging repeat purchases. Customers are more likely to remember and return to a store where they had a positive visual and shopping experience.
Driving Engagement and Sales
High-quality product photos don’t just attract customers—they also keep them engaged. Eye-catching images can stop a potential buyer from scrolling past your listing and encourage them to click through to learn more. The longer a customer spends interacting with your product listings, the more likely they are to make a purchase.
Furthermore, great photos are more likely to be shared on social media, pinned on Pinterest, or featured in Etsy’s curated lists. These shares can significantly increase your product’s visibility, driving more traffic to your store and ultimately leading to higher sales. In this way, investing in top-notch photography can pay off many times over in increased exposure and revenue.
Standing Out in a Crowded Marketplace
Etsy is home to millions of active sellers, and in the UK alone, the competition is fierce. With so many products available, it’s easy for listings to get lost in the crowd. High-quality photography is one of the most effective ways to differentiate your products and catch the eye of potential buyers.
Unique, professional images can make your products stand out in search results and draw attention to a sea of similar items. When shoppers are presented with multiple options, they are naturally drawn to the listings that look the most appealing and trustworthy. By ensuring that your product photos are of the highest quality, you increase the chances that customers will choose your listing over others.
Facilitating Informed Purchases
Finally, high-quality product photography helps facilitate informed purchasing decisions. When customers have a clear, detailed view of what they’re buying, they’re less likely to be disappointed when the product arrives. This transparency reduces the likelihood of returns and negative reviews, both of which can impact your shop’s reputation and success on Etsy.
In summary, high-quality Etsy product photography is not just a tool for making your products look good; it’s a critical component of your overall business strategy on Etsy. As Etsy continues to grow and evolve, the importance of professional, high-quality product photography will only become more pronounced, making it an essential investment for any serious seller.
Basics for Taking Product Photos

Mastering the basics of product photography is essential for creating compelling images that not only attract customers but also accurately represent your products. High-quality photos can significantly boost your Etsy store’s appeal, helping you stand out in a crowded marketplace. Here’s a detailed guide on the fundamental aspects of taking great product photos.
Choosing a Clean Background
A clean, uncluttered background is crucial for ensuring that your product remains the focal point of the image. The background should enhance your product, not compete with it for attention.
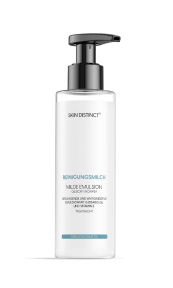
White or light gray backgrounds are the most common and effective for product photography because they are versatile and make colors pop. They also provide a clean, professional look that doesn’t distract from the product. White backgrounds can be achieved using a roll of seamless paper, poster board, or fabric.
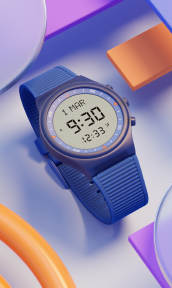
While neutral backgrounds are standard, colored backgrounds can be used strategically to complement the product or convey a particular mood. For instance, a soft pastel background might work well with delicate, feminine products, while a deep, rich color could enhance luxury items.
In some cases, a subtle texture, like wood grain or fabric, can add depth and context to the image without overwhelming the product. This works particularly well for rustic or handmade items, where a touch of natural texture can enhance the product’s story.
Proper Lighting
Lighting is arguably the most critical element in product photography. It affects the clarity, color accuracy, and overall quality of your photos.
For many Etsy sellers, natural light is the easiest and most cost-effective lighting option. The best natural light is soft and diffused, which occurs on overcast days or during the “golden hour” just after sunrise or before sunset. Position your product near a large window to take advantage of this light, and use white reflectors or foam boards to bounce light back onto the product, reducing shadows.
If natural light isn’t available or consistent, artificial lighting can provide the control you need. Softbox lights, LED panels, or ring lights are excellent options for evenly lighting your product without creating harsh shadows. For smaller products, a lightbox can be an effective solution, providing a controlled environment where light is diffused evenly from all angles.
Aim for a three-point lighting setup, where one light (the key light) is the primary source of illumination, a second light (the fill light) softens shadows, and a third light (the backlight) adds depth by highlighting the edges of the product. This setup ensures your product is well-lit from all angles, enhancing its details and texture.
Using the Right Equipment
While it’s possible to take great product photos with a smartphone, investing in the right equipment can significantly enhance the quality of your images.
A DSLR or mirrorless camera with manual settings gives you greater control over focus, exposure, and depth of field. These cameras allow you to shoot in RAW format, which provides more flexibility in post-processing.
The lens you use is just as important as the camera. A macro lens is ideal for capturing fine details in small products like jewelry, while a standard 50mm or 85mm lens is perfect for most other products, offering a natural perspective with minimal distortion.
A tripod is essential for keeping your camera steady, especially in low-light conditions where a slower shutter speed is required. It also helps maintain consistency in framing and composition when taking multiple shots of the same product.
Optimizing Composition and Angles
The way you compose your product photos and the angles you choose can make a significant difference in how your product is perceived.
- Rule of Thirds: Use the rule of thirds to create balanced and visually appealing compositions. Imagine your frame divided into nine equal parts by two horizontal and two vertical lines. Place your product along these lines or at their intersections to create a more dynamic and interesting composition.
- Multiple Angles: Showcase your product from multiple angles to give potential buyers a comprehensive view. Include shots from the front, back, side, and top, as well as close-ups of important details. This helps customers fully understand what they’re purchasing, reducing the likelihood of returns.
- Focus on Details: Close-up shots are essential for highlighting intricate details, textures, and craftsmanship. Use a macro lens or the close-up mode on your camera to capture these details with clarity and precision.
- Framing: Ensure that your product is centered and fully within the frame, with a little breathing room around the edges. Cropping too closely can make the image feel cramped while leaving too much space can make the product appear small or insignificant.
Editing and Post-Processing
Even the best photos can benefit from a little post-processing to enhance their quality and consistency.
- Color Correction: Adjust the white balance to ensure that colors are true to life. Correct any color casts that may have been introduced by your lighting setup.
- Exposure and Contrast: Fine-tune the exposure and contrast to make sure the product is well-lit and the details are visible. Be careful not to overexpose or underexpose, as this can result in a loss of detail.
- Sharpness: Enhance the sharpness of your images to make sure your product looks crisp and clear. However, avoid over-sharpening, which can introduce noise and artifacts.
- Background Cleanup: If your background isn’t perfectly smooth or clean, use editing tools to remove any imperfections or distractions. This can include smoothing out wrinkles in fabric backdrops or removing dust spots.
Mastering the basics of product photography involves more than just pointing and shooting—it requires careful attention to detail, from choosing the right background and lighting to composing your shots and editing them for maximum impact. By focusing on these fundamentals, you can create stunning, professional-looking product photos that not only attract attention but also drive sales on Etsy. Investing time and effort into getting these basics right will pay off in the form of increased customer trust, better brand representation, and ultimately, more sales.
Tips for Capturing Stunning Product Photos

Capturing stunning product photos is an art that goes beyond simply pointing a camera at your product. It involves thoughtful planning, creativity, and an understanding of how to make your products stand out in a highly competitive marketplace like Etsy. Here are some detailed tips to help you take your product photography to the next level and create images that truly captivate your audience.
Seamless Backgrounds
A seamless background is one of the most effective ways to keep the focus on your product while giving your photos a clean, professional look. This technique eliminates any distractions and ensures that the product remains the star of the image.
To create a seamless background, use a roll of paper or fabric that curves gently from the surface where your product sits up to the wall behind it. This creates a smooth, continuous surface with no visible edges. White, light gray, or soft pastel colors work well for most products, providing a neutral backdrop that makes your product pop.
For small to medium-sized products, a portable lightbox is a fantastic tool. It comes with built-in lighting and a seamless background, making it easy to achieve professional results without a complex setup. These boxes are especially useful for jewelry, small accessories, and other detailed items.
When using fabric for your seamless background, make sure it’s tightly stretched to avoid wrinkles or creases that could distract from the product. Iron the fabric beforehand, or choose a material that naturally resists creasing.
Outdoor Settings
Outdoor photography can infuse your product photos with natural beauty and a sense of context that studio shots often lack. It’s particularly effective for products that are inspired by nature, handmade, or eco-friendly.
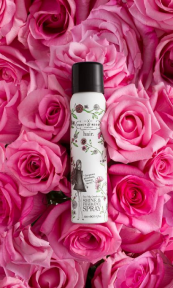
The setting you choose should complement your product and reinforce its intended use or brand story. A lush garden might be perfect for natural skincare products, while a rustic wooden table in a forest setting could enhance the appeal of handcrafted items. Urban settings, like a cobblestone street or a vintage brick wall, can add character to fashion items or accessories.
Natural light is one of the best assets of outdoor photography, but it needs to be managed carefully. The best times to shoot outdoors are during the “golden hours” just after sunrise or before sunset when the light is soft and warm. Overcast days can also provide ideal lighting conditions, offering a natural diffuser that reduces harsh shadows.
Use elements from the outdoor environment to enhance the photo without overshadowing the product. For example, a cozy blanket draped over a chair in a garden can add warmth to a photo of handmade candles. However, ensure that these elements don’t compete for attention with the product itself.
Incorporating Lifestyle Elements
Lifestyle photography goes beyond simply showcasing the product—it tells a story about how the product fits into the customer’s life. This approach can be incredibly effective in creating an emotional connection with potential buyers.
To incorporate lifestyle elements, think about how your product is used in everyday life. If you’re selling kitchenware, set up a table with your product in use, surrounded by other items that suggest a meal in progress. For clothing, consider showing the item being worn in a real-life scenario, like a walk through the park or a casual day at home.
Including models in your photos can bring your products to life and show potential buyers how the items look when worn or used. This is especially important for fashion items, accessories, and even certain types of home decor. When using models, choose individuals who reflect your target audience to create a more relatable and appealing image.
While close-up shots of your product’s features are important, consider also capturing these details within the context of their use. For example, a close-up of a beautifully crafted handbag handle as it hangs on a chair or the texture of a cozy knit blanket draped over a sofa. This approach not only highlights the quality of the product but also shows how it enhances a living space or outfit.
Using Props Thoughtfully
Props can enhance your product photos by providing context, scale, and aesthetic appeal. However, they need to be used thoughtfully to avoid distracting from the product itself.
- Complementary Props: Choose props that complement your product’s style and purpose. For instance, if you’re photographing artisanal soaps, placing them on a rustic wooden tray with a few sprigs of lavender can enhance their appeal. For jewelry, placing the pieces on a soft fabric or beside a book can add an elegant touch.
- Avoid Overcrowding: While props can add interest to a photo, too many can clutter the image and distract from the main subject. Stick to a minimalist approach, using only a few well-chosen items that enhance the product rather than compete with it.
- Scale and Perspective: Props can also help convey the scale of your product, which is particularly useful for online shopping where customers can’t physically interact with the item. For example, placing a small object, like a coin or a standard-sized item, next to your product can give customers a better idea of its size.
Creative Use of Depth and Focus
Depth of field and focus are powerful tools in product photography that can help draw attention to specific details or create a sense of dimension in your images.
- Shallow Depth of Field: A shallow depth of field, where the background is blurred and the product is in sharp focus, can help the product stand out. This technique is particularly effective for highlighting details in jewelry, intricate designs, or textures. It creates a professional look that emphasizes the key features of the product.
- Selective Focus: Use selective focus to draw attention to specific parts of your product. For instance, if you’re photographing a ring, you might focus on the gemstone while allowing the band to softly blur into the background. This technique guides the viewer’s eye to the most important aspect of the product.
- Background Blur (Bokeh): In outdoor or lifestyle photography, you can create a beautiful background blur, known as bokeh, by using a wide aperture setting on your camera. This effect adds a dreamy quality to the photo while keeping the focus squarely on the product.
Experimenting with Angles
The angles from which you photograph your product can dramatically affect how it is perceived. Experimenting with different perspectives can lead to more dynamic and engaging photos.
Shooting at eye level with the product is a classic approach that creates a natural perspective and makes the product feel approachable. This angle is particularly effective for most products, providing a straightforward view that clearly shows the item.
Flat lay photography, where products are arranged and photographed from directly above, has become increasingly popular. This style is perfect for creating visually pleasing compositions, especially for collections of small items, like stationery, accessories, or food items. To make a flat lay engaging, carefully arrange the items and consider adding complementary props or textures.
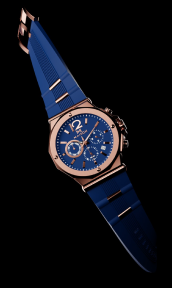
Shooting from a low angle can add a sense of grandeur or importance to your product, making it appear more dominant or imposing. This angle works well for larger items, like furniture, or to give a unique perspective on items that might look ordinary from a typical eye-level view.
For products with intricate details, close-up or macro shots can be incredibly effective. These angles allow you to showcase fine craftsmanship, textures, and features that might be missed in wider shots. Make sure to use proper lighting and a steady hand (or tripod) to capture these details with clarity.
Post-Processing for Perfection
Even the best photos can often benefit from some post-processing to ensure they meet the highest standards of quality and consistency.
Ensure that the colors in your photos are true to life by adjusting the white balance and correcting any color casts. This is crucial for accurately representing your product, particularly if color is a key selling point.
Adjust the brightness and contrast to make sure your product is well-lit and stands out against the background. This step can also help in making details more visible and the overall image more engaging.
Enhancing the sharpness of your images can make your product appear more defined and clear. However, be careful not to overdo it, as too much sharpening can introduce noise and make the photo look unnatural.
If you’re shooting a series of products, it’s important to maintain consistency in terms of lighting, color balance, and overall style. This helps create a cohesive look for your Etsy store, reinforcing your brand identity.
Capturing stunning product photos requires a blend of creativity, technical skill, and attention to detail. By utilizing seamless backgrounds, experimenting with outdoor settings, incorporating lifestyle elements, using props thoughtfully, playing with depth and focus, experimenting with angles, and refining your images through post-processing, you can create captivating images that not only showcase your products beautifully but also resonate with your target audience. These photos will not only enhance your product listings on Etsy but will also play a crucial role in building your brand and driving sales.
Wrapping up
In 2025, Etsy sellers in the UK face a marketplace that is more competitive than ever. To thrive, investing in high-quality product photography is essential. By mastering the basics, experimenting with creative backgrounds and settings, and incorporating lifestyle elements, you can create stunning images that attract and convert customers. Remember, in the world of e-commerce, a picture is worth more than a thousand words—it’s worth thousands of sales.
FAQ
Why is high-quality product photography important for Etsy sellers?
High-quality product photography is crucial because it creates a strong first impression, builds trust with potential buyers, and helps your products stand out in a competitive marketplace. Clear, detailed images can significantly increase customer confidence and lead to higher sales.
What are the basics of taking great product photos for my Etsy store?
The basics include choosing a clean background, using proper lighting (natural or artificial), ensuring a well-lit environment, and using the right equipment like cameras, lenses, and tripods. These elements work together to create sharp, attractive photos that accurately represent your products.
How can I create a seamless background for my product photos?
You can create a seamless background by using a roll of paper or fabric that curves gently from the surface where your product sits up to the wall behind it. This setup creates a smooth, continuous surface with no visible edges, keeping the focus on your product.
What are some tips for using outdoor settings in product photography?
When using outdoor settings, choose a location that complements your product and shoot during the “golden hours” (just after sunrise or before sunset) for soft, natural lighting. Ensure that the environment enhances the product without overpowering it, and use natural elements as props to add context and appeal.
How can I incorporate lifestyle elements into my product photography?
Incorporate lifestyle elements by staging scenes that show your product in use, integrating models to demonstrate its functionality or style, and capturing detail shots within real-life contexts. This approach helps potential buyers envision how the product fits into their lives, creating a stronger emotional connection.


