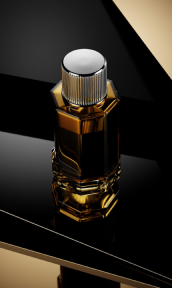
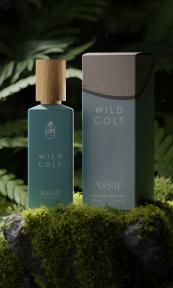
Outdoor product photography offers a wealth of opportunities to create stunning, dynamic images that capture the essence of your product. The natural environment, coupled with natural light, provides a unique setting that can elevate your product shots. Here are some creative and effective ways to showcase products outdoors.
Benefits of Outdoor Product Photography

Outdoor product photography leverages the natural environment to create compelling and dynamic images that stand out. Here are the key benefits and additional relevant details on why shooting products outdoors can be advantageous.
Natural Light
Natural light provides a full spectrum of colors that are difficult to replicate with artificial lighting. This can make the colors of your product appear more vibrant and true to life.
Natural light, especially during the golden hours, provides soft, even lighting that minimizes harsh shadows and highlights. This gentle lighting can highlight the textures and details of your product, creating a more appealing and authentic look.
The quality of natural light can bring out the finer details and textures of your product, giving it a more three-dimensional and tactile appearance. This is particularly beneficial for products with intricate designs or textures.
Unique Backgrounds
Outdoor settings offer a variety of backgrounds, from natural landscapes to urban environments. These diverse settings can help place your product in a context that resonates with your target audience.
Using natural or urban backgrounds can add a storytelling element to your photos. For instance, a rugged outdoor setting can emphasize the durability of a product, while a sophisticated cityscape can highlight its modernity and style.
Incorporating elements such as trees, water, or mountains can add a dynamic and engaging aspect to your photos. These elements can enhance the visual appeal and provide a sense of scale and depth.
Versatility
The changing seasons provide an ever-changing backdrop for your product photography. Each season offers a unique color palette and atmosphere that can be used to refresh and diversify your product images.
Shooting at different times of the day can create various moods and effects. Early morning light can be soft and cool, midday sun can be bright and crisp, and evening light can be warm and inviting.
Different weather conditions can add an interesting twist to your photos. For example, a misty morning can create a mysterious and ethereal look, while a bright sunny day can evoke feelings of joy and energy.
Natural Reflections
Using bodies of water such as lakes, ponds, or even puddles can create beautiful reflections that add symmetry and interest to your photos. Reflections can make the image more dynamic and visually appealing.
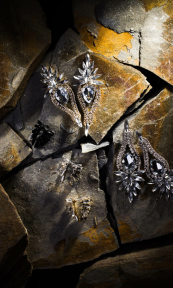
Natural reflective surfaces like wet rocks or glassy ice can also be used to create intriguing visual effects. These reflections can help highlight the product and add a layer of sophistication to the image.
Environmental Integration
Photographing products in an outdoor setting allows you to showcase how they are used in real-life situations. This can help potential customers visualize the product in their own lives, increasing its relatability and appeal.
Outdoor environments can provide a sense of scale and proportion, especially for products that are used in specific contexts. For example, a tent set up in a vast landscape can give viewers a better idea of its size and functionality.
Natural settings often evoke emotional responses from viewers. Whether it’s the tranquility of a forest or the energy of a bustling city, these settings can create an emotional connection with the product, making it more memorable.
Dynamic Elements
Outdoor settings allow for the incorporation of movement and action in your shots. For instance, capturing a person using a product in an active outdoor setting can add dynamism and make the image more engaging.
Showing a product interacting with natural elements, like wind blowing through fabric or water splashing around a waterproof item, can demonstrate its features and benefits in an intuitive and visually appealing way.
By leveraging these benefits, you can create compelling images that resonate with your audience, highlight your product’s features, and tell a captivating story. Whether you’re showcasing fashion items, outdoor gear, or lifestyle products, the great outdoors provides an endless array of opportunities to create stunning and memorable photographs.
15 Outdoor Product Photography Ideas

Expanding your creative horizons in outdoor product photography can help you produce eye-catching and memorable images. Here are 15 ideas to inspire your next photoshoot.
1.Golden Hour Glow
Utilize the warm, soft light during the golden hour to create a magical effect. The gentle illumination minimizes shadows and adds a natural glow, perfect for highlighting your product’s features.
2.Forest Frame
Place your product in a forest setting surrounded by trees and foliage. The natural greenery can create a serene and organic backdrop, enhancing the product’s appeal.
3.Urban Jungle
Incorporate urban elements such as graffiti walls, cityscapes, or industrial structures. These settings can add a modern, edgy vibe, making the product stand out in a contemporary context.
4.Water Reflections
Use bodies of water like lakes, ponds, or even puddles to create reflective surfaces. Reflections can add depth and symmetry, making the image more dynamic.
5.Beach Vibes
Capture your product on the beach, using sand, sea, and sky as the backdrop. This setting is ideal for products related to summer, relaxation, or leisure.
6.Mountain Majesty
Photograph your product against the backdrop of majestic mountains. The grand scenery can emphasize the durability and ruggedness of outdoor gear or adventure-related products.
7.Park Picnic
Set up a picnic scene in a park, with your product as the focal point. This idea works well for food, drink, or lifestyle products, creating a relatable and inviting atmosphere.
8.Rustic Charm
Find a rustic setting like an old barn, wooden fence, or field of wildflowers. The natural textures and earthy tones can enhance the aesthetic of handmade or vintage products.
9.Action in Motion
Capture the product in action, such as a person using the product while hiking, biking, or running. Action shots demonstrate the product’s functionality and appeal to active lifestyles.
10.Flower Power
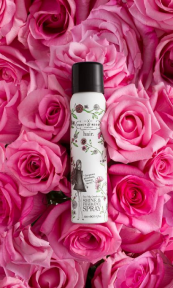
Surround your product with flowers or place it in a blooming garden. The vibrant colors and delicate petals can add a fresh and lively touch to your photos.
11.Sunset Silhouette
Photograph your product against the setting sun to create a striking silhouette. This technique can add drama and intrigue, making the product stand out boldly.
12.Farm Fresh
Use a farm setting with fields, tractors, or farm animals as the backdrop. This idea is perfect for organic, natural, or farm-related products, emphasizing authenticity and simplicity.
13.Desert Dreams
Place your product in a desert landscape, using sand dunes and sparse vegetation. The unique terrain can create a stark and striking contrast, highlighting the product’s features.
14.Garden Party
Set up a garden party scene with tables, chairs, and decorations. This setup is ideal for party supplies, home decor, or outdoor furniture, showcasing the product in a festive environment.
15.Winter Wonderland
Capture your product in a snowy setting, using the pristine white snow and winter elements. This idea works well for seasonal products, evoking a sense of coziness and warmth.
Experiment with these concepts to discover what works best for your product and brand, ensuring that each image tells a compelling story.
Tips for Capturing Stunning Outdoor Shots

Capturing stunning outdoor product shots requires careful planning and consideration of various factors such as lighting, composition, and environment.
- Choose the Right Time
The quality of natural light changes throughout the day. Shooting during the golden hour (shortly after sunrise or before sunset) provides warm, soft lighting that reduces harsh shadows and adds a pleasing glow to your product. Similarly, the blue hour (just before sunrise and after sunset) offers a cool, diffuse light that can create a serene atmosphere.
Overcast days provide even lighting without harsh shadows, making them ideal for outdoor shoots. The diffused light on cloudy days helps in highlighting the product details without the risk of overexposure.
- Mind the Composition
Using the rule of thirds can help create balanced and visually appealing images. Imagine your frame divided into a 3×3 grid and place your product along these lines or at their intersections. This technique draws the viewer’s eye naturally to the focal point of the image.
Pay attention to what’s behind and in front of your product. A cluttered background can distract from the main subject, while a well-chosen background can complement and enhance it. Use natural elements like trees, rocks, or water to create depth and context.
- Control the Environment
Reflectors can bounce light back onto your product to fill in shadows and create a more even illumination. Diffusers can soften harsh sunlight, preventing overexposure and helping to maintain detail in both highlights and shadows.
Outdoor shoots can be affected by wind and other weather conditions. Use weights or clamps to stabilize lightweight products, and be prepared with protective covers for unexpected weather changes. Checking the weather forecast in advance can help you plan better and avoid disruptions.
- Experiment with Angles
Shooting from different angles can reveal new perspectives and highlight different features of your product. High angles can provide a broad overview, while low angles can emphasize the product’s size and importance.
Mixing close-up shots with wide shots can create a more dynamic and engaging photo set. Close-ups can showcase intricate details and textures, while wide shots can place the product within its environment, providing context.
- Post-Processing
Post-processing allows you to fine-tune your images. Adjusting brightness and contrast can help make your product stand out and look more vibrant.
Use editing software to remove any distracting elements from the background. This ensures that the focus remains on the product. Cropping and retouching can also enhance the overall composition and presentation.
These tips will help you navigate the challenges of outdoor photography and create images that are both beautiful and effective in showcasing your products.
CGI in Outdoor Product Photography

While outdoor product photography offers many benefits, there are situations where CGI – computer-generated imagery – can be a faster, cheaper, and more convenient alternative.
Time Efficiency
CGI eliminates the need for scheduling shoots around weather conditions and daylight hours. Products can be rendered at any time, reducing delays and increasing productivity.
Cost-Effectiveness
Setting up an outdoor shoot can be expensive, considering the cost of travel, equipment, and potentially hiring models. CGI allows you to create high-quality images without these additional costs.
Convenience
With CGI, you can create perfect lighting conditions, eliminate environmental disruptions, and have complete control over every aspect of the image. This level of control is particularly useful for products with reflective surfaces or intricate details.
Endless Possibilities
CGI offers limitless creative possibilities. You can place your product in any environment, real or imaginary, without the logistical challenges of an actual shoot. This flexibility allows for more innovative and eye-catching visuals.
Wrapping up
Outdoor product photography harnesses the beauty of natural light and diverse environments to create captivating images. By following the tips and ideas outlined above, you can elevate your product shots and engage your audience effectively. However, for those seeking faster, more cost-effective, and highly controllable solutions, CGI presents a compelling alternative. Whether you choose the organic charm of outdoor photography or the precision of CGI, both methods offer unique benefits that can help your product shine.
FAQ
What is the best time of day for outdoor product photography?
The best times for outdoor product photography are during the golden hour (shortly after sunrise or before sunset) and the blue hour (just before sunrise and after sunset). These times provide soft, diffused lighting that minimizes harsh shadows and highlights, creating a pleasing glow and enhancing the overall look of your product.
How can I manage harsh sunlight during an outdoor shoot?
To manage harsh sunlight, you can use reflectors to bounce light and fill in shadows, and diffusers to soften the sunlight. Shooting on overcast days can also help, as the clouds act as a natural diffuser, providing even lighting without harsh shadows.
What should I consider when choosing a background for my outdoor product photos?
When choosing a background, consider how it complements your product. Avoid cluttered backgrounds that can distract from the main subject. Use natural elements like trees, rocks, or water to add depth and context. Ensure the background aligns with the product’s branding and intended use.
How can I ensure my product remains the focal point of the image?
To ensure your product remains the focal point, use the rule of thirds to position it in a visually appealing spot. Keep the background simple and free of distractions. Utilize shallow depth of field to blur the background and highlight the product. Additionally, use lighting to draw attention to the product’s key features.
What are some post-processing tips for outdoor product photos?
In post-processing, adjust brightness and contrast to make your product stand out. Remove any distracting elements from the background to maintain focus on the product. Enhance colors and details to make the image more vibrant. Cropping and retouching can also improve composition and presentation, ensuring a polished final image.


